Showing posts with label Food. Show all posts

Wednesday, April 8, 2015

Knock It Off!

I might have mentioned this before, but I really LOVE soup.  Pretty much all kinds of soups.  I love to eat them here or there.  I love to eat them anywhere.  When I'm on a trip (like on a great big ship), or even when I do not roam but rather stay somewhere close to home. 

Now that we've established that (again), let me say that I was really happy to learn that there are some really clever cooks out there who are able to deconstruct (and even better share) their "knock offs" versions of some of my favorite restaurant soups:

This soup is awesome!!!!!! Must try! Copycat Panera Broccoli Cheese Soup | http://therecipecritic.com | #recipe #soup #broccoliPanera is a great restaurant specializing in soups, sandwiches, salads.  But what I like about Panera even better is their philosophy of giving back to the community through their Panera Bread Foundation.  To raise awareness of hunger in the US and to help provide meals for those in need, they operation some of their cafes on a pay-what-you-can model - some pay more so that others who have little or nothing can pay less.  It's such a great plan and I like helping them with that project.  One of my favorites there is their Broccoli Cheese Soup.  It's easy, cheesy deliciousness that I can make in no time with very few ingredients:

from The Recipe Critic


Olive Garden is a great place for lunch!  Who can beat their "all the soup, salad and breadsticks" you can eat for less than $10?  And they have some really great soups (which when I can't get to a restaurant I can now make at home):

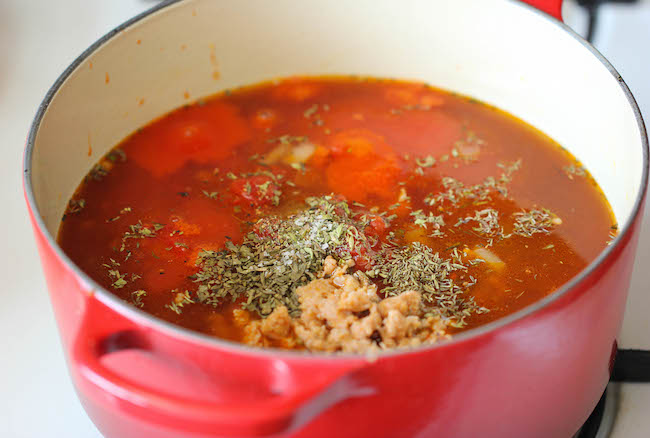
Olive Garden Pasta e Fagioli - A super easy, no-fuss copycat recipe that's wonderfully hearty and comforting, except it tastes 100x better! 
from Damn Delicious


from Carrie's Experimental Kitchen
 
Olive Garden Minestrone Soup


from HubPages


~later, slurping away, tw

Friday, March 20, 2015

Pin A Meal, Give A Meal


If you Pin (and c'mon - who doesn't these days?) then here is something you can do to add to what I'm sure is a fabulous collection of recipes AND help others at the same time!

Between March 2nd and April 30th, the Land O'Lakes people will donate $1 to Feeding America for every recipe pinned or repinned from the Land O'Lakes Pinterest Board (or select one of your own).  $1 helps provide TEN MEALS secured by Feeding America on behalf of local member food banks.  Land O'Lakes GUARANTEES a maximum of 3.5 million meals!!!

So check out these fabulous recipes and help others with your selections!
 
 
~later, tw


Thursday, March 12, 2015

Eureka!

I've found it!!!

I suppose this would be way more exciting if it were a cure for cancer or the solution to the US monetary crisis but you should realize that finding the perfect hummus recipe is, to me, roughly the equivalent to finding the secret of life.

Huggos on the Beach - with Hummus, of course!
I really love hummus.  Considering that I practically avoided the dreaded garbanzo (aka chickpea) for the first nearly five decades of my life, you wouldn't think it would be possible for me to learn to really LOVE hummus.  In a former life I used to scan the dessert portion of the menu first but now I find myself seeking the appetizer section instead to see if maybe, just maybe, they've got a hummus platter for me to try.  Seriously folks - I've had it on the beach in Hawaii, at the Hit It Here CafĂ© at Safeco, and even our local Red Robin (served with tortilla chips - so wrong!).  I've had it everywhere man!

And given that it's only got a few ingredients, I knew I should/could be able to make it at home.  After some research, some questionable starts, the perfect blender (a Vitamix) and more than a few pitas (you've got to have pitas!), I can safely say without reservation (and very little bragging!) that I have discovered the perfect *BASE* Hummus Recipe:

Terri's Most Excellent Hummus Recipe
 
  • 2 - 15 oz. cans garbanzo beans (chickpeas), drained and rinsed
  • 2 cloves garlic, minced
  • 4 Tbsp. (heaping) tahini (peanut butter is NOT a substitute here!  My daughter, Jenny, subs some sesame oil since her family doesn't really groove on tahini.  I did try that as well - in one of the many versions - but I prefer the tahini version)
  • 4 Tbsp. lemon juice (preferably fresh squeezed but you use what you gotta use)
  • 1/2 tsp. salt
  • 1/2 tsp. cumin
 
I put all of this into my fabulous Vitamix blender - it really is a thing of wonder.  I originally got it intending to make incredible smoothies from all my produce.  Thing is I don't really like drinking green sludge and couldn't get the hubby too interested in it either.  But this blender, only 18" tall so it fits on the counter under the cupboard (well it does now that we've remodeled the kitchen and made things a bit more "standard" rather than the random 16" height they were before!") is the only appliance that sits out permanently in the new kitchen (even my beloved KitchenAid mixer sits in a cupboard - it's own, very special cupboard to be sure, but still out of sight unless in use).  It is amazing (indeed essential!) for making hummus.
 
But even the powerful and mighty Vitamix has some trouble managing two cans of chickpeas so I add about one can of water as well (little by little thru the cap) until the blender will...you know...blend!  I like my hummus fairly smooth so adding the water really is a personal thing.  I've tried the suggestion of removing the "skins" from the chickpeas but that is really a boring task and with the Vitamix totally unnecessary.  If you've got some other blender, then I would suggest: a) putting some water into your blender first (because the weight of the chickpeas will stall your blender and might burn up the motor - not a good thing); b) try removing the skins of the chickpeas but get a friend to help because it takes forever!: and c) start saving your pennies for a Vitamix.

 
I like to serve my hummus with a drizzle of most excellent olive oil (not the stuff I cook with - the stuff that is actually meant to be eaten as is) and just a few red pepper flakes (doesn't add any heat but sure does make it look "presentacious").  There are many things to accompany this hummus but my personal favorites are pretty much what you see here: wedges of fresh pitas, cubed feta cheese, Kalamata olives, sliced carrots and sliced cucumbers (celery or jicama is lovely too - I just didn't have any on hand). 
 
Something else to try are "add ins."  This recipe is really just a *BASE* so you can add other things to increase the yumminess.  I've tried it with sun-dried tomatoes with success and next time I make it I going to add some marinated artichokes I've got lurking in the refrigerator.  I don't know if I'm brave enough to try one person's suggestion of replacing one of the cans of chickpeas with a can of black beans, but you never know!
 
Pitas are an absolute must and everyone I know swears by this recipe:
 
by Sandy at allrecipes.com
 
I did make a batch of these to accompany my hummus.  You can only imagine my surprise when these turned out exactly as they were supposed to - pocket and all!
 
~later, totally enjoying my Mediterranean meal nirvana, tw


Tuesday, March 3, 2015

Thinking Outside the Box

Growing up Catholic in a pretty much entirely post-Vatican II world meant as a family we only did the "non-meat Friday" thing during Lent.  I'm fairly certain it wasn't the Church's intent for this to be a period of "treat" (in fact I think I read once that it was supposed to have exactly the opposite effect) but that's exactly how it worked out for me.  When I was younger, my mom worked and so frequently came home at the end of the week to a teenager, two small girls (one of which was yours truly) and husband - all wanting dinner.  Challenging enough during the rest of the year, trying to remember to do something meatless during Lent clearly taxed mom's cooking creativity beyond the max.  Didn't matter to me that we alternated between pancakes (for dinner!  What kid doesn't like having sugary syrup for dinner????) and, ... wait for it ... (because it remained one of my most wicked indulgences well into adulthood) ... Kraft Macaroni and Cheese.

Yeah, that orangey goodness from the blue box.  I loved it!  It was truly my favorite part of the Lenten season.  Pancakes were good but couldn't hold a candle to that deliciousness of creamy, orange sauce and (usually overdone) elbow noodles of Kraft M and C.  (In later years due to some unforeseen "downsizing" of our incomes I was forced to learn how to make M and C from scratch as at that time it was far cheaper to buy Velveeta than the boxed version and my love affair with the box was pretty much doomed.)

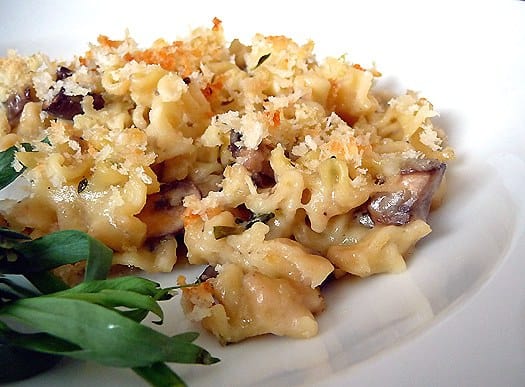
Wanting to expand my repertoire of recipes (not only soup ones), I went to the definitive source for everything M and C - my daughter Jenny.  She quickly fired off a half-dozen wonderful sounding recipes but the one that most intrigued me (and maybe because cremini mushrooms had just arrived in my vegetable box), was this:

from Michelle at the Brown Eyed Baker
 

This turned out to be the most incredible M and C I've ever had!  The hubby LOVED it.  I only made a couple of changes to her recipe - some from necessity (no chives on hand), some from choice (not really a huge tarragon fan).  I did happen to have shallots in my bin and I would seriously recommend using them versus onions.   If onions is all you got, it's all you got, but since you'll probably have to run to the store to get some gruyere (it absolutely must be gruyere!!!) anyway you might as well pick up a shallot and give it a try.  I did use whole milk (because I had it on hand but I'm sure it would be nearly as delicious but obviously not as decadent with 2%) I opted for the "non-white Cheddar cheese" (aka the stuff I had on hand which I find I love better than the white version).  Note: resist the urge to bump up the cheese.  I agree it's tempting because how could more cheese be anything but more delicious?  But if you use gruyere you'll get plenty of flavor from the 6 oz. (and save some $$ - that stuff ain't the cheapest cheese from the block) and using any more cheddar (regardless of color) will result in a grainier texture initially and a greasier product when you reheat leftovers.  Instead of plain bread crumbs, I turned to my bread crumb of choice - panko (which gives a much nicer golden crust finish to the end product.  You should definitely find some panko in your store - often on the Asian/International Food aisle - and give them a try.  They make the absolute best crunchy topping on whatever you make!).
 
As I was adding the white wine vinegar I kept checking and rechecking the recipe - didn't she really mean just white wine?  I was dubious but I went ahead and added it as instructed and it gave just a hint of tang to the dish.  My only "disappointment" with the "ta da" moment was that I just used plain old elbow mac.  Next time I make it (and believe me there will be a next time!) I'm going to use a fancier short-cut pasta that will make the presentation as special as the taste.
 
~later, tw

Monday, February 23, 2015

Soups to Entertain

Friday night we had our friends over for dinner.  They are the absolute best friends which means I can fearlessly try new/untested recipes on them (because we all know and understand that the pizza place just ain't too far from where we live).  The fact that it is now Lent and Gerry and I abstain from meat on Friday (which our friends do not) just brought another level of challenge to the game.

Checking the veggie bin (always my first step), I knew I had two leeks and a head of cauliflower, a good beginning, so I started searching for a recipe to make the most of that.  Here's what I found:

by chefsquig on Allrecipes.com
 
Roasting the cauliflower first is what hits this soup out of the park!  I did read some of the reviews (highly recommended) and agreed with many who said that roasting at 275 degrees will not give a desired result so I bumped up the heat to 375.  The problem with that is you really have to watch the finely minced garlic or it will burn (not a good thing!)  Garlic which stuck to the cauliflower was golden, garlic which fell off onto the baking sheet was too golden (didn't get all the way to burnt but that's clearly where it was going).  I think next time I make this soup I would just roast a couple of whole cloves with the cauliflower and then toss the cloves into the soup since I used my "boat motor" (aka immersion blender) to finish it off.  I made my roux with flour which turned out to be perfect.  Some reviewers felt it was thick enough without adding flour.  I think that must depend on the size of your head of cauliflower.  Mine apparently was on the smaller side and it definitely needed that thickener.  Once I had the roux going, I used a splash of white wine to deglaze my pot and finished off with the balance of the directions.  For serving we offered crumbled bacon (for a non-meatless version) and/or shredded cheese along with a rosemary version of my "go to" bread.
 
Throwing together something company-worthy for dessert (without making a stop at the store) usually involves pre-planning but this time I decided to try:
 
 
This is a classic recipe from the Depression when some ingredients (eggs, butter and milk) were not available and/or hard to come by and she has listed quite a few variations on her site.  I opted for the basic Chocolate Crazy Cake and did just as told.  I mixed the dry ingredients (in the cake pan), made the three depressions for the vinegar, vanilla and oil and then added the water.  I'm not exactly sure why this couldn't have all been done in a bowl (except that I will say it was kind of fun to watch the vinegar react to the baking soda - something you don't really see in the bowl with this small quantities).  Although NOT getting another thing dirty (in this case a bowl) was a plus, it was tricky to get into the corners of my 8x8 pan to make sure the flour and cocoa had thoroughly combined. 
 
In any event, the cake was a success!  Easy-peasy, all ingredients were found in my house first try and it produced a pretty tasty little cake.
 
 
~later, tw
 
(PS - Congrats to JK Simmons (UM alum) on his Best Supporting Actor win last night!!!  


Tuesday, February 17, 2015

Asian Inspired Soups

Gerry and I love to visit the little Chinese restaurant not too far from our home.  It's a quiet little place with great food/prices conveniently situated next door to our primary grocery store.  The lunch special can't be beat (I always pretend I'll try something new but I always select Kung Pao Chicken) which includes a bowl of either Hot & Sour Soup or Egg Drop Soup.  Gerry always picks the former and I, with equal certainty, always select the latter.

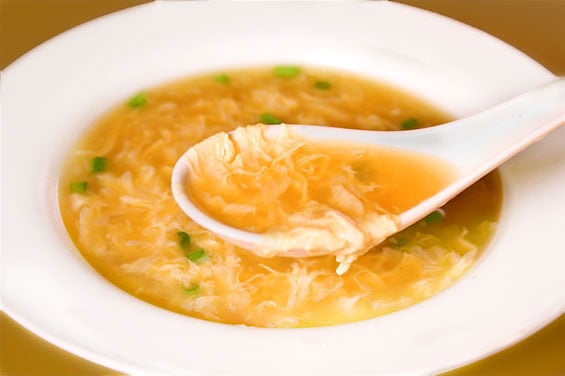
So on my ever-continuing quest to seek out and try new soup recipes at home, I thought maybe it was time I try each of these.  My first opportunity came one day when Gerry was out to lunch with some of his buds and it was a bit chilly which required something hot for me.  I discovered this recipe:

from Ali at Gimme Some Oven
 
Easy Homemade Egg Drop Soup -- tastes just like the restaurant version, but it's super easy and affordable to make at home! | gimmesomeoven.comA quick check of the pantry "green lighted" this recipe in a hurry.  The only change I made to the recipe was the omission of the creamed corn (I can't even remember the last time we had a can of creamed corn on the shelf!).  The flavors of the ginger, garlic and sesame oil were subtle and delicious - way, WAY better than anything had that starts with a packet of Ramen Noodles and it's dried (too salty) flavor packet.
 
Here's something I learned about making Egg Drop Soup from The Pioneer Woman:  There are two textures that can be achieved when you add the eggs.  1) Probably the more standard variety is created by whisking the broth mixture, STOP STIRRING and then pour the eggs into the swirling mixture without addition stirring.  This gives those "threads" of eggs, almost like noodles.  2) For a more creamy version, just keep on whisking the soup while you add the eggs and it will all become a blended, creamy soup.  In true Chinese restaurant fashion, I chose some from column A and some from column B and wound up with a creamy soup with some strands of "egg noodles".  DELISH!
 
We like to have a soup going all the time (either fresh from the soup pot or rewarmed from the fridge) as it makes an easy, EASY meal (especially now that I've discovered I can make BREAD!) and we've really liked what eating a lighter meal in the evening does for both our waistlines! 
 
I really love vegetable soups (don't think I've actually found one I haven't enjoyed) and what with Lent beginning this week I'm always on the look out for another non-meat recipe to add to the repertoire.  This week's version is a real winner: A vegetable soup with a very different flavor profile!
 
from Joanne at Eats Well With Others
 

nine vegetable hot and sour soupIn order to make this soup, I did have to visit the grocery store (we don't usually have cabbage of any variety on hand).  Turns out when I got home I didn't have any bok choy either (which is actually more of a surprise than you might think - anytime it's available as a choice from my delivered veggie box I always pick it!) but this recipe is easily adapted to include whatever vegetables you might have on hand.  In this case, though the author doesn't groove on celery, I do.  And I think that celery (though definitely not as much fun as bok choy - I even love saying the word "bok choy"!), does resemble the non-leafy part of bok choy.  If you sub different vegetables though you might just want to change when they get added.  In my case, because I used celery I opted to throw it in with the onion in the first step.  Unfortunately (for this soup) I had used up the last of my "leafy greens" (which I think are pretty interchangeable) in the quiche the day before but I would have sliced up any chard, spinach and/or kale and added it at the end (in the bok choy step).  No tofu was harmed in the making of this soup (as I really do NOT like tofu at all!) and I don't think it detracted from the final product, which was INSANELY delicious. 
 
Since I had not experienced Hot & Sour Soup before I asked the resident family expert on this (the hubby) if I had come close.  He said this was so much better because there was so much more depth of flavor.  Another winner!
 
 
The Cake
Finally, a bit of motherly bragging:  Jenny, our daughter, recently made a birthday cake for her friend's daughter's 4th birthday party.  This little girl, like pretty much every little girl on the planet, wanted a "Frozen" cake.  Here's what Jenny created:
 
And coordinating cupcakes

~later, tw


Friday, February 13, 2015

Feeling a Bit Crabby

Last Saturday the Knights of Columbus of our church had their annual Crab Feed.  The KC do a terrific job - a huge salad bar and all the crab you can eat.  In fact, MORE than all the crab you can eat since they make available for a donation bags of crab for you to take home and enjoy again.

We brought home two such bags and Gerry spent the better part of Sunday afternoon cracking those little Dungeness crabs and harvesting the meat.  Then it was up to me to come up with something to do with that 2 1/2 lbs. of wonderful cracked crab meat.

First up:
Crab Cakes
 
Crisp Crab Cakes
I started with this recipe I found at foodnetwork.com (Crispy Crab Cakes by Ellie Krieger).  I liked this recipe because it calls for panko (Japanese bread crumbs).  If you've never tried these, I highly recommend them.  You can probably find them in most grocery stores these days (I'm guessing on the aisle with "international foods").  They do a fabulous job of giving that really crispy exterior you find on fried food - often without actually frying (not only healthier but really saves on the clean up in the kitchen!). 
 
 
I also liked that it uses Old Bay Seasoning because apparently I picked up a can of it for some recipe years ago and just haven't had another need for it.  (Always like to be using up things!)  The only changes I made to this recipe were: used both red & yellow bell peppers because a) I happened to have both on hand; and b) it's really pretty.  I also used chipotle tabasco instead of the regular kind.  Not horrible - a bit smoky (don't think they hubby noticed or mind) but I need to put the regular kind on my grocery list right now while I'm thinking of it.


Then we tried:
Terri's Crab Bisque
 
This I started with a recipe from allrecipes.com (Shrimp and Crab Bisque by Katrina Berry).  I really do recommend reading through at least the first few recommendations from others here because you learn so much from their trials, errors and suggestions.  I really used her recipe as a springboard and the final result was really my own.  Though I usually hate recipes written in this manner I'll give a narrative of what I did:
 
 
  1. I melted 3 T butter and added 1 tsp. of minced garlic and sautĂ©ed this for about 30 seconds before adding 3 T flour.  To this I added one tube of  chicken broth, salt & pepper to taste, a pinch of onion powder, 1/2 tsp. of Old Bay Seasoning and 1 T. of parsley.
  2. Added 3/4 C. of Half & Half plus 1/4 C. of sherry (which does go better with the crab than white wine.  I would recommend purchasing a bottle of sherry - NOT COOKING SHERRY!!!  NEVER BUY COOKING SHERRY!!!  - a bottle of sherry (cooking sherry is just salty crap) won't set you back much and can be "splashed" in other wonderful foods as well.  If you don't want to do this then by all means use a lovely white wine that you intend to serve with this deliciousness (though I would probably use as much as 1/2 C of wine as opposed to 1/4 C sherry).
  3. Adjust seasonings: add more Old Bay, a dash of cayenne, a generous amount of paprika for color and taste (1-2 T.)
  4. Add crab and remaining Half & Half and bring to bubble to thicken.  Mine did get a bit thicker (more chowder-like) which I thought I would prefer but turns out next time I would make it a bit thinner and more bisque-like.


Finally, last night we enjoyed:
Terri's Crab Quiche
 
Crab Quiche I RecipeOnce again I started the process with a recipe I found on allrecipes.com (Crab Quiche I by CHRISTYJ) and pulling together from various suggestions and recommendations from others I cobbled together this recipe (which I must say was probably the best crab experiment this week - though the crab cakes were a very close second!)
 
  1. Make your own crust!  Some reviewers suggested just pouring the filling into a pan for a crustless version but quiche just really needs the crust to send it over the top and a store bought crust will just not do it for me.
  2. Get some kitchen help!  There were a couple of steps to this project and everyone of them seemed to involve another pan and/or bowl and utensil.  It was great having the hubby keep up with my dishes (and then make a salad to go with while it was in the oven baking) so that there weren't dishes left to look forward to at the end of the meal.
  3. The steps:
    1. In a sautĂ© pan (larger than you might think), I started with some olive oil and butter and then put the sliced green onions and finely diced red pepper.  To this I added a large bunch of thinly sliced lacinato kale (or any leafy green like spinach, chard, etc. would work) and sautĂ©ed until wilted.
    2. Shredded 1/2 lb. (about 1 1/2 - 2 cups) of Gruyere (Swiss) cheese.  I did look at the suggestions by some of other cheeses (cheddar, goat) but again, quiche in my mind requires Swiss and this is not a run-of-the-mill every night type of meal so I went with the Gruyere - it did not disappoint!
    3. Beat together 4 eggs plus 1 C. Half and Half.  I used my hand-held mixer (because I didn't want my dishwasher to quit on me by bringing out the blender) and it did the trick.  Just make sure to actually beat this combination together until frothy - a simple whisking will not give the desired results.
    4. Assemble the layers in order: 1) the crab meat; 2) the slightly cooled vegetable mixture; 3) the cheese (reserve a small handful for the top); 4) the egg mixture. 
    5. Sprinkle the remaining cheese on top and bake at 350 for 45 minutes.  Allow to set 10 minutes before cutting/serving.  (Can also be served at room temperature.)
 
Finally, our "Crab Week" came to an end but not without putting the remaining 3/4 lb. of cooked crab meat in the freezer for another time (Lent is soon upon us).
 
~later (no longer crabby!), tw

Sunday, February 8, 2015

I can make BREAD!

It's true!  I've learned how to make bread.  But first the main course...

This year I'm trying to focus on soups - all kinds of wonderful, delicious, comforting soups.  There really is just something about a bowl of soup.  It nourishes body and soul, stirring up memories long forgotten.  And the SMELL - from the first moment you start it, the whole house smells absolutely wonderful.

Okay.  So we are all in agreement now that soup is a fabulous thing (probably the 8th Wonder of the World).  One would only have to check out my Pinterest Board entitled Soups, Stews, Chilis and Chowders to see the extent of this love affair I've got going with soup.  I'm committed to trying each soup I've got pinned there (which is turning into something of an arduous task since I keep finding MORE recipes each day!)

Tonight's entry is:

Katerina Petrovska
 
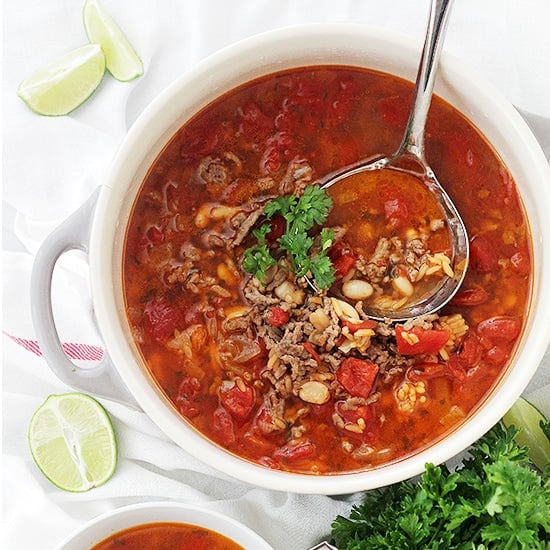
Once again I immediately was drawn to this recipe because I actually had everything to make it right on hand in my kitchen (always a good start to any recipe!).  The recipe calls for Mexican (or fresh) Chorizo.  I buy this in a 3 lb. chub at Cash & Carry (a local restaurant supply store).  Often stores will carry Spanish Chorizo.  This version is actually a smoked meat which you can find in the deli section of the store (wherever they have other types of sausages).  You actually can use either (just diced up the sausage if using that type).
 
When I was describing the recipe to my sister (as a possible soup creation for her budding 2nd grade chefs at her school), I realized that it reminds me of the classic Weight Watcher Chili.  (Just substitute hamburger for the chorizo and green beans for the "any other type of bean.") 
 
But as I said I actually had the called for ingredients on hand and made it (this time) exactly according to the recipe.  Spicy, but delicious!
 
The thing is there is an unwritten rule that soup must have a "go with" item.  Soup & salad.  Soup & crackers (buttered - thanks mom for teaching me that lesson!).  Soup & bread.
 
Ah, yes.  Soup and a really good bread.
 
So clearly just working through my Soup Board will not be enough of a task this year.  I'm also going to work through my Breads Board.  This could be a real challenge because I've never been much of a bread baker.  I think it requires an amount of patience I apparently did not receive at birth.  But I'm up for a challenge (heck it's just barely February - I can't throw in the towel now!!!)
 
So to go with my very spicy soup I made an artisan bread.  Yes, you read that correctly - an artisan bread!!! 


That's MY LOAF of bread!!!  It was delicious!!
This was truly an amazing experience.  Trust me when I say - Yes, You Can!  You can make bread!!!  There are only four ingredients.  It only calls for 1/2 tsp. of yeast.  That means you can make FOUR loaves from a single packet of yeast (in case you don't want to commit to purchasing an entire jar of yeast.   But I recommend you buy the entire jar, keep it in your fridge and NEVER buy store-bought bread again!!!)
 
If you don't have a cast-iron pan I highly recommend the purchase of a Le Creuset dutch oven (I used my 3 1/2 qt. signature round which is pretty much my "go to" pot for everything).  It's perfect for making this bread.
 
I can't wait to try it again using some fresh rosemary...or maybe some grated asiago...or... I'm never buying bread again!!!
 
~later, tw


Tuesday, February 3, 2015

National Chocolate Month

Did you know that February is National Chocolate Month?  That seems to make sense what with Valentine's Day and all.  But February 5th (Thursday) also just happens to be World Nutella Day.

Nutella, that chocolately hazelnut spread.  I love seeing the ads with the moms stating how easy it is to give their kids a great start to the morning by spreading that "nutritious" spread on toast and sending their very wired kids out the door.  Teachers must love it.  My daughter says "we have a word for that spread - it's called FROSTING!!!

But the "Swedish contingency" (my other daughter and her family) loves the stuff (I think it's a European thing) and so as a good mother/grandmother I stock up on the stuff when I know they are coming.  And since it's one of those things that is way cheaper to buy at Costco, I have a bunch leftover when they leave.

And that's why I love, Love, LOVE Pinterest!  People are so creative and helpful when I need a recipe (or two...or three) to use up something rather than just pitch it.

So here's a recipe I served during our Super Bowl party and is just the thing for your World Nutella Day Celebration!

 
Three-Ingredient Brownies Recipe : Ree Drummond : Food Network - FoodNetwork.comThey are decadent, they are delicious, they are insanely easy (c'mon - THREE ingredients).  It's actually easier to make than any mix I've ever used!  I was thinking I was going to have to double up this recipe for our gathering (since it says it only makes 9 brownies) but then I read the entire recipe (always a good thing before actually making anything) and realized that it's a 9x13 pan.  That would make 9 REALLY BIG brownies - nobody needs that amount.  And once out of the oven, I could tell they were really, really rich and decadent so we cut them into 24 squares which was the perfect party size.  Enjoy!
 
~later, tw


Monday, February 2, 2015

Souper Bowl!

Now that the Super Bowl is over (and not with a particularly happy conclusion), it's time to get back to the real SOUPER BOWL.

Since Gerry is now home during the day I've been making lunch our more substantial meal, which still allows me to cook (something I enjoy doing) and still gives us the balance of the day to work off those calories.

Dinner is most often a bowl of soup and I've enjoyed exploring the Soup Boards of Pinterest for ideas.  Cooking for just the two of us can be difficult (unless one likes eating leftovers for the rest of the week) but leftover soup is an entirely different beast.  Soups often improve with a little time spent in the fridge and are better eaten leftover as the flavors have more chance to marry.

Here are some of the recipes we've tried this year:


Bloody Mary Chili Recipe : Ree Drummond : Food Network - FoodNetwork.com
We enjoyed this during the game yesterday and it makes a lot.  I was certain there would be leftovers but NO!  It was enjoyed by all - even the 3-year-old (so not too spicy at all).  I did make it exactly as she did (even mixing up the "Bloody Mary" separately before adding - though I used a 4-cup measuring cup because it made it easier to pour into the pot) but here are some ideas for changes:

  1. I bought actual Bloody Mary mix (V8 brand) and had the hubby try it solo.  He said spicy V8 would have worked just fine.
  2. I'm trying to use up some liquor "leftovers" from bartending days so I had vodka on hand.  If you don't I would not suggest buying even a small bottle of vodka just for this recipe.  You could either buy one of those teeny tiny bottles (I call them a "nip") and they have them everywhere now and are pretty inexpensive.  One small bottle would be the 1/4 cup you'd need.  Or...just omit it.  I'm still trying to figure out the fascination with adding vodka - it's pretty much tasteless (especially when the alcohol is cooked out) but what the heck?  It uses up something I have on hand!

 from A New York Foodie

This was our vegetarian option yesterday (I also figured the 3-year-old might not like the spicier chili above - kids!  They keep you guessing!!!)  My vegetarian sister-in-law suggested I could add meat to the leftovers for Gerry & me, however, we frequently eat "meatless" meals these days so this soup will neither go to waste nor have meat added to it.

The only "change" I made to this recipe was to add the parsley (dried because that's all I had) plus fresh rosemary with the other ingredients (rather than waiting until the last 10 minutes).  I was making this ahead to reheat when everyone came over plus I felt there wasn't really any other seasoning in the soup and I thought I'd like to give the rosemary/parsley a bit of time to infuse the veggies with some flavor.

~later, tw


Thursday, August 28, 2014

Trying New Things

I make a pretty mean banana bread (not just my opinion - Gerry really loves it too).  It turns out perfectly every single time, a fact which makes me really less inclined to explore other options for using "frozen" bananas (isn't that what you do with bananas about to go?  Chunk them in the freezer?)  And it's really hard to even consider trying to fix something that ain't broke.
 
Terri's (previously one and only) Banana Bread Recipe

Ingredients:
  • 1 Cup Butter (recipe says you could use margarine instead but I'm thinking that might be what actually causes some to have problems with the recipe)
  • 2 Cups Sugar
  • 4 Eggs
  • 1/4 tsp. Salt
  • 2 tsp. Baking Soda
  • 4 Cups Flour
  • 6 Large, very ripe bananas, mashed
  • 1 Cup chopped pecans
Directions:

Cream together butter and sugar.  Add eggs, one at a time, beating well after each addition.  Sift dry ingredients together and add to creamed mixture.  Add bananas and nuts.  Pour into two well-greased 9x5 loaf pans (TW's Note:  I usually use 5-6 whole pecans to "decorate" the top of each loaf.)  Bake at 275 F. for 90 minutes (Yup - 275 F. - a VERY SLOW oven for 1 1/2 hours.  This means that the top/bottom won't get over-baked or even possibly burnt while leaving you with "raw spots" in the center of your loaf.)

I tried the recipe my mom always made - delicious - but just couldn't get it to turn out 100% of the time.  When I stumbled upon this version, I knew I had a winner!

But in my attempts to use up things I've accumulated in my kitchen (like whole wheat flour - something Jenny, of course, uses all the time but I've never really seem to have a use for) and my ever-increasing Pinterest boards, I found a new best friend: 

Whole Wheat Yogurt Banana Bread with Cinnamon on the blog Crunchy Creamy Sweet by Anna.  This bread is absolutely incredible and I know I'm going to have fun exploring some of her other recipes as well.

~Later, (looking for more new recipes to try), tw

Saturday, January 25, 2014

Simple Pleasures

This pan, as most everything (and everyone for that matter) in my world has a story...

As pans go, it probably isn't anything that anyone else in the world (save my two sisters) would find remarkable.  For starters, it's a strange size - definitely not your standard 9" x 13".  Not even a less-than-unusual 8" x 10".  It's something like 7 3/4" x 10 1/2" or so.  Nobody's ever measured it.
 
But it was my mom's...and now it's mine.  I've probably shared that Eleanor was not really much of a cook.  I got the distinct impression that it was never anything she wanted to do but was forced out of necessity, owing to the fact that she had a husband and at least two kids home all the time, to spend time in the kitchen.  "Throwing something together" for dinner was likely to result in a) sloppy joes and canned corn (her "go to" meal); b) something extremely well done (she liked charred food...but oddly not BBQ) or c) an extremely strange and usually unappetizing mixture of what could only be charitably called "glop."
 
She did, however, absolutely excel at following directions - the more complicated, the even more fantastic the result.  (This was, after all, the woman who made my dad's suits!).  This meant that baking, with many intricate steps, was something right in her wheelhouse.  There was that phase in her life where she decided to learn how to decorate cakes and took classes and purchased all the Wilton supplies.  The results were stunning works of art and she could have easily made money with that venture.  Alas, (or fortunately for all of us), turns out we didn't really care for frosting and so that was a short-lived project.
 
And to be fair, I'm sure she actually used this pan for lots of things...like baked ham...and... okay.  I don't actually remember anything else but her Oatmeal Cake in this pan.  My sister Dona and I tried to figure out or remember where this recipe came from (Dona seems to remember it as possibly being on the canister of Quaker Oats). 

But in my memory, this recipe and this pan share a symbiotic relationship.  Oh, I made the cake in years past and it was pretty darn good, quickly conjuring up its predecessors in my mind.  But now that I am in possession of the pan I no longer have to rely on those cherished memories of my childhood.  I can have it on a whim any day of any week (it should be noted that the new oven with its truly magical properties of turning out perfect product every time might have something to do with this as well).
It's a very simple cake and though you can just prepare the necessary oats to make the cake, you can also make use of something I seem to find myself having more than a bit of on hand, leftover prepared oatmeal.  (When you cook for large groups and make 30-50 servings at a time, leftover oatmeal isn't such a strange occurrence.  But that's another story.)
 
So here's my mom's recipe for Oatmeal Cake.  It's simple, it's wonderful, and now it can become a cherished memory for you!

Oatmeal Cake from the kitchen of Eleanor Klar
 
Ingredients:
1 1/4 C. boiling water
1 C. oats (rolled, not instant)
1/2 C. butter
1 C. sugar
1 C. brown sugar
1 tsp. vanilla
2 eggs
1 1/2 C. flour
3/4 tsp. cinnamon
1/4 tsp. nutmeg
1 tsp. baking soda
 
Directions:
Pour water over oats, let stand 20 minutes.  Beat butter, add sugars.  Add vanilla and eggs.  Stir in oats.  Add dry ingredients.  Pour into greased and floured 9" inch square pan (or 8" x 10" unless you have a special pan from your mom which has magical properties and is is approximately the same overall size).  Bake at 350 F. for 50-55 minutes.  Let cool slightly and sprinkle with powdered sugar.
 
~later, sipping tea with my cake, tw 

Tuesday, October 29, 2013

Christmas? Already??

This past Saturday we had a family/friends gathering with a purpose.  Our son-in-law (Travis) is currently deployed and his unit will not be home for the holidays.  Because we need to allow (LOTS of) time for shipping, we got together a group to work on making Christmas stockings for stuffing in the not-too-distant future.

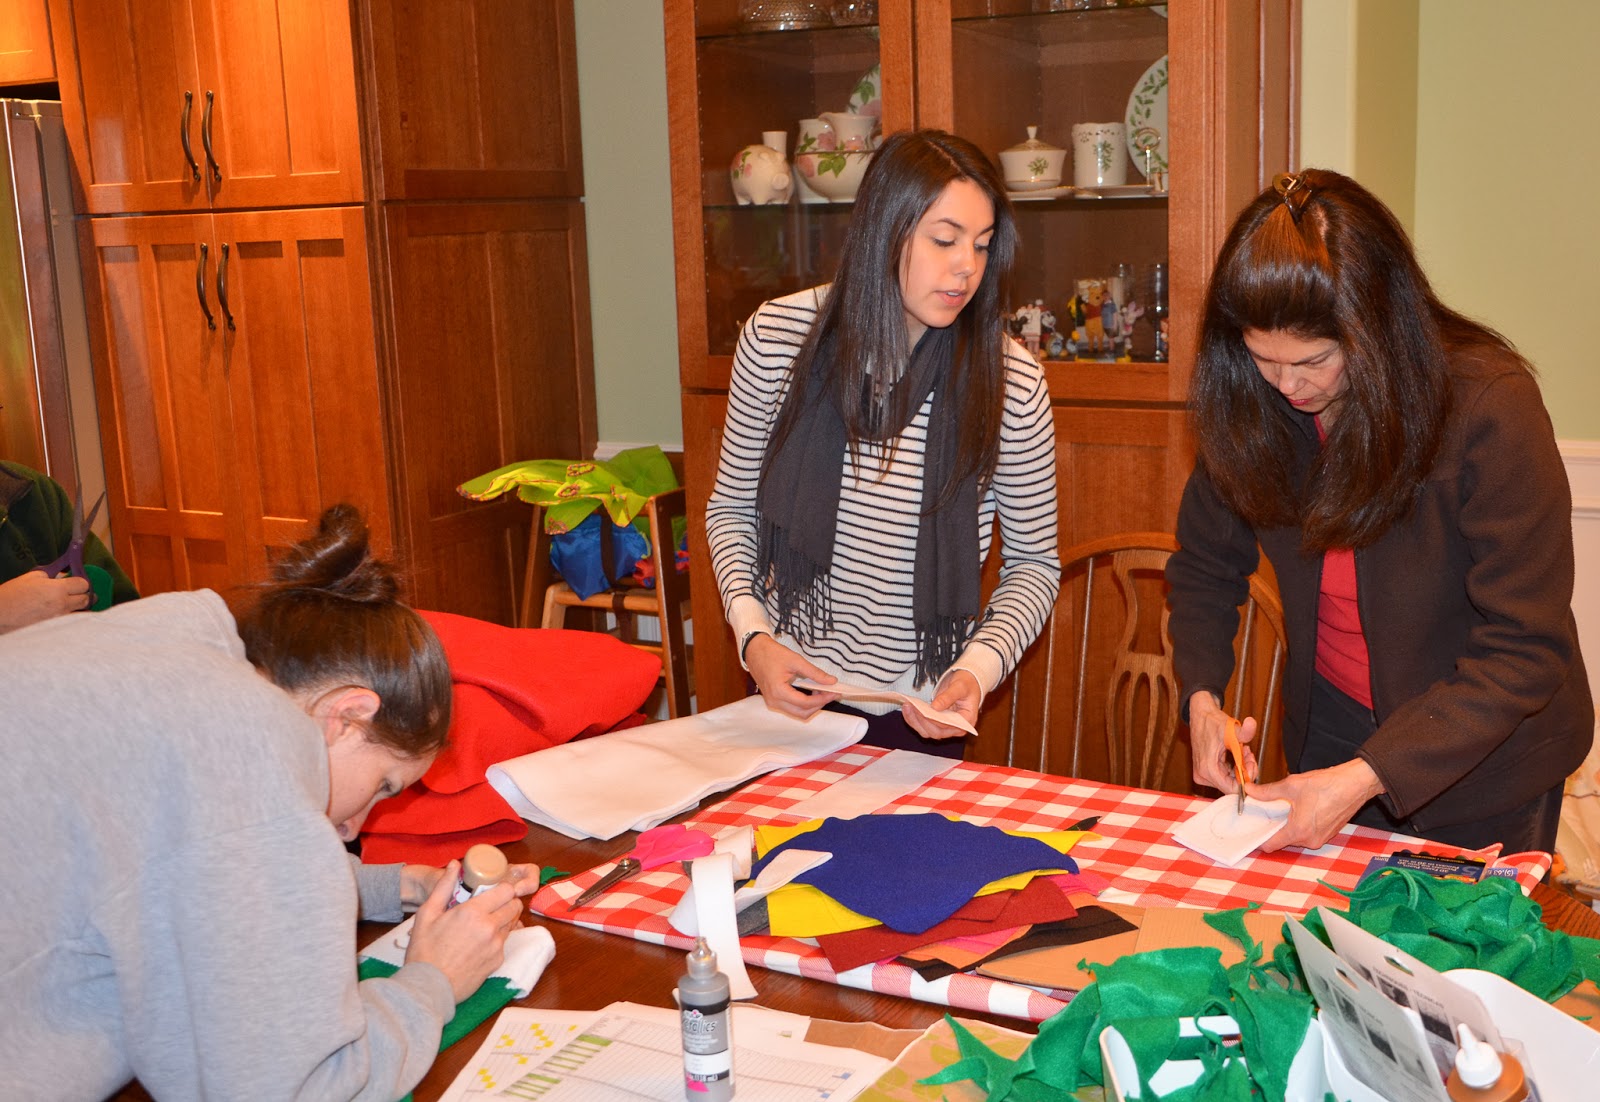
The project was a simple one (I kept telling everyone that I started doing this project 20 years ago with first graders so I was pretty sure they could handle it!).  Stockings were traced and cut from felt:

A bit of typecasting here - John is tracing the pattern
with chalk (appropriate for a brand new teacher!)


Michael cuts out stockings (and is in charge of keeping the troops
"hydrated" - which must explain why he's working at the bar!


Marah cuts out the green stockings


Even Jax was put to work getting
the proper pieces together for
me to sew.
Yours truly assembling
the stockings.


To assemble, the stockings were then sewn together. 


Jeff gives a final "pink"
to the stockings.


Last step before heading to the decorators:  the edges were trimmed with pinking shears.  Then the stockings were decorated with puffy paints, glitter pens and felt scraps.  We had quite a group - 15 adults, one 4-year-old, 2 toddlers, one infant.  At one time or another I saw every single adult either with scissors in hand or decorating stockings (who knew some of these guys were so crafty!)  Though they tried to "mass produce" some elements for the stockings, they actually turned out quite unique and wonderful. 


Shh!  Don't tell Travis!


Aunt Marne helped Jax decorate a Christmas stocking for his dad.


Elizabeth helped keep Milo entertained.
Mark goes "old school" - keeping
the baby asleep while watching
the game!


People took turns minding the little ones as well (I saw several of the "grandpas" holding Milo at some point during the afternoon/evening). 


Gerry & Pete (in the background) start dinner prep.
Pete & Jeff "stirrin' &; saucin'"


While some were still working on stockings, others turned to the dinner portion of our event: a potluck stir fry.  Everyone brought things to contribute and we filled the new 10 ft. island with all sorts of veggies (bok choy, edamame, shredded cabbages, water chestnuts, mushrooms and more) and goodies (like chicken, shrimp, crabmeat and yakisoba noodles).  We handed out large bowls and people could toss in their selections and head to the cooktop to make their sauce selection and where Pete, Jeff and yours truly took turns doing the actual stir frying.  Even the kids loved it!


An having dinner with Elizabeth and Jax.
Shay digging in!


Jenny, Gerry & I owe a HUGE thank you to:
Carol, Mark, Jeff, An, Marne, Pete, Marah, Adra,
Sam, Cindy, John, and Michael! 
I know that Travis and his unit are going to have a
much merrier Christmas because of your efforts!!!!

The finished results:


~later, counting...days 'til Christmas, days 'til Travis comes home, but most of all my many, MANY blessings, tw